What Screws To Use for Motherboards?

Knowing how to install motherboards is a crucial aspect of building a PC from scratch.
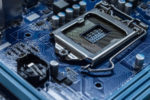
After choosing the best motherboard, you’re now ready to connect it to other hardware components, such as the processor and graphics card.
Speaking of installation, one of the most common questions is what screws to use for motherboards.
Like most newbie PC builders, you may also be wondering if motherboards come with mounting screws.
Read on to learn about screws for mainboards and how to find the right screw for your installation needs.
What Are Computer Screws?
Computer screws are the hardware used to secure different components or parts of a PC to the case.
There are numerous manufacturers of computer cases, but they generally use only three thread sizes.
A screw thread, commonly called “thread,” is the helical structure that determines whether it will fit into the hole of the PC case.
When you buy a case, it will come with its own screws, but it won’t provide screws for securing the different components inside.
Motherboards and other circuit boards often use #6-32 screws, sometimes called 1/4” screws.
ALSO READ: Do Motherboards Have Integrated Graphics?
What Screws To Use for Motherboard
If you buy a brand-new good-quality motherboard, there’s no reason it shouldn’t arrive with a set of screws.
However, if you are installing an old board or reusing a second-hand unit, it may not always come with screws (or a complete set).
In this case, you will have to figure out the screws that match your board before you make a purchase.
Types of Motherboard Screws
While your PC case will most likely come with screws for mounting the motherboard, it pays to know the different types you’ll need.
This way, you’d find it easier to look for replacements in case one or two get lost in transit or during installation.
You will come across several different types of screws when assembling motherboards in computers.
Some of them are pretty common, while others may be difficult to locate in a store.
M5x10
This type of screw mounts fans securely to the case. It has a flat head and is usually of the Philips No.2 star type.
The M5x10 screw has a thread diameter of 5.5mm and a length of 10mm.
6-32
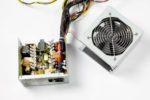
6-32 screws hold the expansion cards that you attach to your motherboard. They also secure the power supply and the side panels of the case.
This type of screw has a hexagonal head, a thread diameter of 3.5mm, and a thread pitch that measures 1/32 inches.
To mount this screw, you will need a Philips #2 screwdriver.
Thumbscrews
A thumbscrew has a reasonably larger head that has been knurled.
Such a design allows the screws to be tightened or loosened using your fingers.
Thumbscrews are commonly used to hold the side panels of the case.
M3 Hexagonal Head
This type of screw is for holding your setup’s optical drives.
It looks very similar to a 6-32 screw, but it has a smaller diameter measuring 3mm.
Also, an M3 screw has a finer thread compared with the 6-32.
M3 Round with Long Shaft
This screw secures the board to the standoffs and is also used to attach SSDs to their brackets.
The M3 round-head screw requires a #1 Philips screwdriver.
M2 Round with Short Shaft
This screw is identical to the previous model, only that it has a shorter shaft.
M3 Metal Standoff
This brass standoff is used to mount the mainboard on the mounting tray inside the case.
It has a male and female thread, with a pitch of 0.5 mm and a shank length of 3mm.
M3 Metal Standoff (Coarse Thread)
This separator has a thread pitch of 1/32.
Tips for Mounting a Motherboard
The motherboard tray is typically held in with two screws, but you will need more to attach the entire motherboard assembly securely.
In general, you will need a minimum of five screws to hold the board in place—one on each corner and one in the middle closest to the video card slot.
When you purchase a new motherboard, it will come with a set of screws and posts.
As mentioned earlier, standard motherboard screws are #6–32 x 3/16″. M3 screws are also used, although less often.
There’s no denying that motherboard screws are among the essentials you need to install a mainboard.
Aside from choosing the correct screws for your motherboard, consider these tips for mounting your mainboard properly.

1. Pay attention to the standoffs.
If your board comes with a pack of screws, you can use them without any issue.
The rule is that if the screw fits and it fits tightly, it will work. If you tighten the screws correctly, nothing can go wrong.
However, since a typical PC case is made of a conductive material, attaching the mainboard directly to it can trigger a short circuit.
To prevent this from happening, motherboards make use of threaded brass standoffs.
Standoffs are small pieces of metal similar to screws.
However, instead of the “head,” they have an anchor where you will insert the motherboard screw.
Technically, they are threaded separators used to raise one part in an assembly above another.
Their primary purpose is for the motherboard to not touch the case and prevent a short circuit.
Traditionally, standoffs are screwed into the case. The board is placed on top before the screws are inserted.
When you start assembling your motherboard, you will need standoffs.
Take note that each motherboard screw requires a standoff.
Depending on your board’s form factor, you will need varying numbers of screws and standoffs.
Good thing, many computer cases already come with standoffs.
Sometimes, they come pre-installed for you so that all you’ll need to do is insert the motherboard screws.
Regardless of whether your case has built-in, pre-installed, or separately included standoffs, make sure your PC case supports the size or form factor of your motherboard.
Another thing to remember is that motherboards don’t come with standoffs, which is a common misconception.
While motherboards are standardized in terms of form factor, PC cases vary significantly in size, shape, and depth.
As such, screws and standoffs won’t always be the same for a specific PC build.
Nonetheless, there’s a lot of standardization for standoffs and screws. For example, standoffs for an ATX motherboard will work with any ATX case.
Motherboard standoffs require a hex driver to install, although some only need a clip that snaps into the tray.
Installing standoffs is easy.
Simply place the motherboard over the tray, ensuring that the tray and board are properly aligned and that the standoffs are visible through the mounting holes.
Next, insert the screws or clips to attach the board to the case.
2. Keep everything tight yet balanced.
When mounting your board to the PC case, you need to ensure that every screw is inserted tightly.
A single loose screw can fry a whole motherboard. Think of any loose screw as a ticking bomb for your motherboard.
When mounting the screws, be careful not to put too much pressure. You certainly don’t want to break the motherboard.
Ideally, you want the screws to be tight enough so that the board attaches securely to the case and other PC components.
However, it should not be too tight that it feels like the motherboard will crack at any moment.
More importantly, you want to apply equal pressure on all corners when mounting the screws.
Basically, this means that you shouldn’t tighten a screw completely before moving on to the next one.
3. Use the right tools.
It seems the most obvious thing in the world, but many people think it doesn’t matter that much.
Ensuring that the screws fit correctly depends greatly on the tools you use.
Essentially, you want to use the correct screwdriver for the specific type of screw you are using.
A quick search online should help you determine the screwdriver type you need for the installation.
4. Use brass screws.
While you can use steel screws to fasten the motherboard, brass screws are a better choice because brass does not rust.
As you can imagine, rusted screws will be not only challenging but also quite impossible to remove later on.
Aside from the material, another vital thing to consider is the length of the screws.
If the shank is too long, there’s a good chance it will impact the circuitry in your motherboard and cause damage.
Often, motherboards require hexagonal screws that have a longer shank.
Screws with flat and round heads are generally shorter and are mainly used for hard drives.
RELATED: Do Motherboards Come With Screws? (Guide)
Conclusion
Now that you know what screws to use for motherboards, you are one step closer to installing your mainboard correctly and securely.
If you’re purchasing a new gaming motherboard, it will most likely come with a set of screws, but you may have to buy standoffs separately if they don’t come included.
Again, remember to mount the screws gently and with great care.
Motherboards have very sensitive components, and even slight excess pressure can damage them.
It’s pretty easy to determine whether the screws are inserted too loosely or too tightly.
Just make sure to follow the tips mentioned in this guide when installing the motherboard on your PC, and you’ll be fine.