How To Check What Motherboard I Have: The Most Effective Ways

We have been using our computers for almost five years now without problems and never really put much thought into their components.
Recently, though, they started going slow every time we run our favorite games and image rendering software.
We think it is high time we upgraded, but we do not have the budget to replace the whole thing.
To make partial upgrades, we must know how to check our computer parts, beginning with how to check what motherboard I have.
If you find yourself in the same situation, you might want to consider the following procedures for checking your system.
How To Check What Motherboard I Have Quickly And Easily
With a Windows 10 computer, you will find quick and easy built-in tools to help you identify the components attached to your PC.
ALSO READ: How to Choose a Motherboard?
One way is by using the Command Prompt, and the other is by browsing the System Information dialog.
Using Command Prompt To Check Your Motherboard
We found that using Command Prompt is the easiest way to check important details about a motherboard.
Command Prompt can provide your motherboard's serial number and model.
Just use the following steps:
- Pull up the search menu from the taskbar by clicking on the magnifying lens icon.
- Type “cmd” in the area where it says “Type here to search,” and hit Enter on your keyboard.
Another way to open the Command Prompt window is by using the Run shortcut.
- Step #1
Simultaneously press the Windows and R buttons on your keyboard.
- Step #2
Type “cmd” in the area where it says “Open” and hit Enter on your keyboard.
The Command Prompt window will open right after doing any of these steps.
After the Command Prompt window opens, you can ask the Windows Management Interface Command (WMIC) to bring up the name, model number, and other details of your motherboard.
- Step #3
Type “wmic baseboard get product, manufacturer, version, serialnumber” exactly as it appears here without the quotations.
Notice how the terms “serial” and “number” do not have a space between them.
The command will also work without the spaces right after the commas in the string.
That’s it.
Command Prompt will show the details about your motherboard’s manufacturer, model number, serial number, and product version.
- Step #4
As soon as you get your motherboard details, you can exit Command Prompt by clicking the exit button on the upper right corner or keying in “exit” and hitting Enter.
You can proceed to the manufacturer’s website to check more details about your motherboard.
Pulling Up System Information To Show Motherboard Details
System Information is Windows’ built-in system profiler.
It displays diagnostics and troubleshooting information about your computer hardware, software, and operating system.
If you have Windows 10 operating system, System Information comes bundled with it.
To check the details about your motherboard, use the following procedure:
- Step #1
Open the System Information window using the “msinfo32” command.
Like Command Prompt, you can open System Information using the search menu or the Run shortcut.
Just replace the “cmd” input in the previous section with “msinfo32” before hitting Enter.
- Step #2
Browse down with your mouse scroller or click and drag the scroll bar on the right side of the System Information window until you find details about your motherboard.
As the System Information window opens, it will show an overview of the hardware and software running on your system.
You will find the details of your motherboard listed under item “Baseboard.”
- Step #3
After getting what you need, you can exit the System Information window by clicking on the “Close Find” button on the lower right corner of the screen.
Verifying Motherboard Model Using Third-Party Apps
There are cases where Command Prompt and Windows System Information cannot retrieve and put up your motherboard information.
Conversely, some people might find the built-in tools of Windows for showing motherboard details somewhat lacking.
If you are one of those people and want to find more details such as base clock speed, overclocking speeds, bus clock, and firmware interface, you can use third-party applications.
While many third-party downloadable apps and online programs cost some money, a few apps are quite reliable and free.
You might want to check out the CPU-Z Utility and the Belarc Advisor apps.

Using CPU-Z Utility
CPU-Z is a system information software that collates essential information about some of the primary devices attached to your computer system.
It can bring out the details about your processor, motherboard, and memory modules.
You can download the CPU-Z app installer from the CPUID website, but before you do, check if your computer is running a 32 or 64-bit version of windows.
Once you are sure about the version of your operating system, follow these steps:
- Step #1
Click on Setup – English under the Classic Versions menu on the CPUID website.
The website will open a new page with a Download CPU-Z section saying, “the file cpu-z_1.96-en.exe is ready for download.”
- Step #2
Click on the DOWNLOAD NOW button.
The download should start and finish at the status bar, usually at the bottom of your browser.
- Step #3
Click on the executable file cpu-z_1.96-en.exe.
A window will pop up to ask you if you want to install the software.
- Step #4
Click on Yes. A setup window will open, showing the license agreement for the software.
- Step #5
Click on “I accept the agreement” and click on Next.
The next window will ask you for a destination or installation location.
- Step #6
Browse for the appropriate folder or click on Next if you are OK with the listed destination folder.
The next window will ask you about what to name the destination folder.
- Step #7
Change the folder name or keep it as is and click Next.
The installer will ask you if you want to create a desktop icon for the software on the next screen.
- Step #8
If you don’t want the installer to create a desktop icon, untick the box before clicking Next.
The window will give you a summary of the previous tasks you just accomplished.
- Step #9
Click on Install to proceed with the installation.
- Step #10
Wait for the installation to complete and click on Finish.
- Step #11
If you choose “create a desktop icon,” you can open the CPU-Z app by double-clicking on its icon on your desktop.
Otherwise, you will find a CPU-Z launch icon under “Recently added” in the start menu.
As you open the app, it will do a scan of your computer.
Wait for the scan to complete and the CPU-Z app window to pop up.
- Step #12
Finally, click on the Mainboard tab to see the pertinent details about your motherboard.
The Mainboard tab will list the motherboard manufacturer, model, bus specifications, and chipset.
It will also list the brand and version of BIOS and connections for the installed external graphic interface.
Using Belarc Advisor
Like CPU-Z, Belarc Advisor compiles a detailed profile of your installed hardware and software.
However, it adds more features such as network inventory, antivirus status, and security benchmarks.
Belarc Advisor also tells you about any missing security updates.
You can download the freeware from the Belarc website and install it with this procedure:
- Step #1
On the Belarc website, click on download a free copy of Belarc Advisor.
The next page will prompt you to input an email address where the website will send your download.
You do not have to fill in your complete name and organization.
- Step #2
Key in your email and click Send download.
- Step #3
On the next page, tick the box to inform the website that you are not a robot, and click Send download.
The actual download link will be available on the next page.
- Step #4
Click on “click here for your download” and wait for the executable file to begin downloading on your browser’s status bar.
If you have problems finding the executable file on your browser, you can access another download link in your email inbox.
- Step #5
Click on the advisorinstaller.exe file to run the installer.
Like in CPU-Z, the first window contains a license agreement verification.
- Step #6
Click on “I Agree” and then click on Install.
After the installation, a window will ask if you want the Belarc Advisor to check for new security definitions.
- Step #7
Click on Yes, and wait for the Belarc Analysis scans to finish.
As the app finishes scanning, a browser page will open and list all the details about your computer.
You can find your motherboard details under the heading “Main Circuit Board.”
The webpage will also list important details about your operating system, processor, storage drives, memory modules, and peripheral devices.
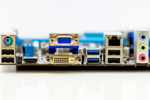
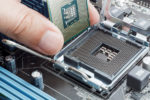
Doing a Physical Check To Determine Hardware
Sometimes, it is impossible to get the details of your hardware through built-in and third-party software.
If that is the case, you might have to open up your computer tower to check the motherboard model on the hardware manually.
Our complete guide on motherboard replacement will also list the procedures for removing attached components so that you can see all the labels on your motherboard.
RELATED: How Much RAM Can My Motherboard Handle? (Guide)
I Know My Motherboard, Now What?
If you already know what motherboard you have and you need help with diagnostics, check out our guides on testing motherboards and red light troubleshooting.
Each of these guides offers in-depth procedures for further analyzing which components you need or might want to upgrade to give your PC a boost.
You might want to make sure your motherboard is dead before purchasing the best motherboard replacement.
Conclusion
Windows has gone a long way in giving its users multiple avenues to check and update their computer systems.
Using the previously listed procedures, you can get the specifics of your hardware, especially the ones about your existing motherboard.
As soon as we answered how to check what motherboard I have, we verified the model on the manufacturer’s website and listed down all of its features.
With the same knowledge, you can figure out what and what not to purchase for computer upgrades.
You can also check out the latest AMD models and Intel boards to see if you have a similar product.