How To Test a Motherboard With a Multimeter: A Guide for PC Owners and Builders

Whether you are a hardcore PC builder or a textbook technophile, it is important to have some basic troubleshooting skills.
It will help you keep your computer in excellent working condition and get the best user experience.
One skill you need to figure out is how to test a motherboard with a multimeter.
Your motherboard is the backbone that helps your computer run properly and efficiently, especially if you're gaming.
Having the skill to identify some of its basic problems using a multimeter brings you one step closer to solving them.
If you do not know how to use this handheld tester or are not familiar with it, we got you covered.
What Is a Multimeter?
A multimeter or volt-ohm meter is a handheld device used for measuring voltage, resistance, amperes, and other values.
It has a wide range of applications, from simple tests to identifying electrical faults to troubleshooting complex problems.
No self-respecting electrician is without a multitester.
It is also very popular among DIYers, especially those who are into computers and other electronic devices.
Multimeters come in two versions: analog and digital.
ALSO READ: Logic Board vs Motherboard
Analog Multimeters
The analog multimeter is designed like a microammeter, a device calibrated to measure very small electric currents in microamperes.
It has a needle that changes position over a graduated scale, depending on the amount of current that it detects.
This setup makes it more difficult to read accurately compared to a digital tester, where the actual number is displayed.
It is also more vulnerable to damages and must be handled carefully.
However, it is very effective if you want to test for changes in voltages since you can watch the needle as it moves.
It also comes with a lower price tag compared to its digital cousin.
Digital Multimeters
The digital multimeter is the more common and readily available type of tester.
It comes in a wide range of options, from simple versions to complex designs.
Understandably, it also has a very broad price range.
The more advanced models can be several times more expensive than the analog version.
However, the price of the basic digital tester is not that much higher.
The most obvious difference between a digital and an analog tester is that the former has an LCD.
It shows the actual value of the reading, taking away all the guesswork that comes with the analog’s needle.
Consequently, it is easier to use, making it the more popular choice among electricians and DIYers despite its higher cost.
What Are the Common Problems of the Motherboard?
If your computer shows error codes, does not display anything, reboots the system, or refuses to reboot, you might have CPU problems.
There is also a good chance that your motherboard is acting up.
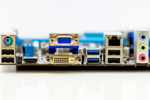
Several key components are located on the motherboard, which means that there are more potential sources of problems.
That is why issues with the motherboard are the most difficult to troubleshoot.
To help you identify them sooner, below are some of the most common motherboard problems.
Not Enough Power
Motherboards have not just one but two power connections. The primary has 20 to 24 pins.
The secondary has four to eight pins and is tucked away by the processor socket.
Both have to be plugged all the way in and seated properly to avoid loss of power.
Short Circuit
A motherboard carries many capacitors and is filled with soldered connections.
It takes the place of convoluted wiring systems in routing data and power from one component to another.
Motherboards are held afloat inside the computer by standoffs, a series of screws about a quarter-inch thick.
This is necessary to prevent any contact with other metallic components, which might lead to short circuits.
Still, it happens more often than you might think.
Overheating
Overheating is another common cause of computer failure.
With all the components connected to the motherboard, it stands to reason that it is the most vulnerable.
That is why you need to pay attention to your heat sinks, fans, and other cooling solutions.
This is especially true if you are overclocking.

What Are the Common Causes of Motherboard Failure?
The motherboard links all key parts of the computer, so it is hard to pinpoint why if it fails.
You need to rule out every other component before you can say for sure that the problem is the board.
Still, some issues happen more often and are worth looking into.
Below are some of the usual suspects.
Poorly Connected Cables
The motherboard is the platform to which the CPU, GPU, hard drives, and all other parts are linked.
In this scenario, it is easy to lose track of a less prominent but equally important component: the cables.
If even just one of these cables is loose or not secure, it could cause a wide range of problems.
What that problem is would ultimately depend on which part the loose cable connects to.
Make sure that all cables are plugged in tightly.
This will help you avoid some motherboard problems or at least make your troubleshooting easier.
Power Surges
A power surge or electrical spike does not happen often, but if it does, it can cause severe damage to your computer.
It can affect your motherboard, your hard drive, or any other electrical component.
While it is impossible to predict when a surge can happen, you can eliminate its risk by using a surge protector.
Dust
Excessive accumulation of dust is one of the most common causes of overheating.
It can reduce the dissipation of heat and disrupt the electrical currents in your board.
Keep your computer away from dust and heat-generating devices to prevent this from happening.
You should also clean your motherboard every three to six months.
Normal Wear and Tear
Like most electrical or even mechanical parts, your motherboard goes through the usual wear and tear as it ages.
There is nothing you can do to prevent this.
Still, you can prolong your motherboard’s shelf life by protecting it from dust, not bumping it, and avoid spilling anything on it.
RELATED: How To Test Motherboards (Guide)
What Happens When a Motherboard Fails?
Problems with the motherboard can manifest in many ways.
For instance, your computer could be working just fine one moment and suddenly freeze without warning.
The infamous “blue screen of death” could also pay your computer a visit.
In other cases, your computer could start getting sluggish or not recognize hardware.
If these things happen more often than before, it might be time to take out the air compressor or your multimeter.
You should also have the number of a computer technician ready.
How To Test a Motherboard With a Multimeter
A motherboard is an electronic component.
If it fails, there is a good chance that the issue is electrical.
That is why if you own a computer, you should learn how to test a motherboard with a multimeter.
Here’s how you do it properly and, more importantly, safely.
1. Test for Short Circuits
The first thing you need to do is isolate the power source.
You can do this by turning your computer off and disconnecting the plug.
Wait a few minutes before you use the multimeter to make sure that there is no residual electricity.
Once a few minutes have passed, take out your multimeter and adjust it to the lowest setting for resistance.
Touch the two test probe leads together and make sure that it reads zero.
Next, test the chassis to ensure that there are no charges left.
If the meter reads zero, it is safe to remove the chassis so you can access your motherboard.
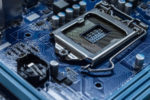
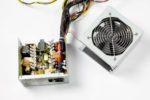
Once you see the motherboard, remove the ATX connector.
It is a 20-pin connector hooked up to the AC power.
After this, touch the tester’s black lead on the chassis and the red lead on the AC ground pin of the PSU.
Again, a zero reading is a sign that things are OK.
Without breaking the contact between the black lead and the chassis, check all the colored wires with the red lead.
In this part, the reading should not be lower than 50 ohms in any of the wires.
2. Check for Faults
Once you have checked the board for short circuits, check it for faults.
To do this, you need to remove your motherboard completely.
Start by taking out the mounting screws on the side panel or undoing the clamps.
Next, pull the panel off carefully, then check the ground pins using the tester’s red lead.
The odd-numbered pins from three to 17 must have a zero reading.
Take note that you may have to refer to the chart to find the right pins to test.
3. Check for DC Voltages
To check the motherboard for DC voltages, it has to be hooked to the power supply.
You have to retrace your steps and mount it back into the computer.
Make sure that the ATX connector is also plugged in.
Next, adjust the multimeter to 20V DC and touch the black probe to pins 15, 16, and 17 at the back.
The red probe then goes to pins nine and 14.
The reading should be five volts for pin nine and three to five volts for pin 14.
After this, turn the computer on. All the readings should then be zero.
Finally, touch the red probe to pin eight. If there are no problems, the tester should read no less than 2.5V.
When you press reset, the tester should read zero but go back up again.
Conclusion
Troubleshooting a motherboard seems daunting, but there are cases where you can safely do it on your own.
All you need is a reliable multimeter and the right information.
With these, you can keep your motherboard in tip-top shape and get to know your PC more intimately.