How To Connect RGB Fans to Motherboard

Computer hardware generates heat quickly, especially if you use your rig for demanding tasks like gaming.
As you can imagine, too high temperatures for prolonged periods will most likely result in performance issues.
A great solution to overheating issues is to use a cooling system. And for many PC builders, this means RGB fans.
Before we teach you how to connect RGB fans to motherboards, you’ll want to learn how to choose the best one first.
What Makes a Good RGB Fan?
Because it combines superb functionality with visually appealing aesthetics, an RGB fan is popular among PC builders.
With this on board, you will instantly level up your entire gaming experience.
When looking for an RGB fan, make sure you consider the size, noise level, speed, and, of course, the lights.
ALSO READ: How To Download Motherboard Drivers
Size
More often than not, you will come across fan sizes ranging from 25mm to 250mm.
Obviously, the ideal size for you depends on which one fits into the chassis of your PC case.
If you have enough available space in your rig, you can always go with a bigger fan.
However, it might be considered overkill if you install a bigger one when your computer doesn’t get too hot anyway.
In that case, you can get away with a smaller unit.
Noise
The noise level is a good indicator of how well an RGB fan performs.
Smaller fans generally produce a louder noise because they operate at a higher speed.
Speed
A fan’s speed is measured in RPMs or revolutions per minute.
Generally speaking, a higher fan speed means better air circulation inside your PC case.
Light
RGB fans produce a broad range of colors, so your choice depends entirely on your preferences.
Still, you want to consider choosing an RGB fan that comes with comprehensive yet easy-to-use software that lets you control the colors.
How To Connect RGB Fans to Motherboard
The whole matter of connecting an RGB fan to a motherboard isn’t a complicated topic.
You don’t have to be a tech geek or anything like that to do it yourself.
Even if it’s your first time touching your motherboard or connecting something to it, you will be just fine.
Still, keep in mind that mobos are sensitive devices. A little too much pressure or a silly mistake can cause damage to your board.
Here’s how to connect RGB fans to motherboards correctly:
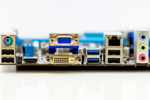
Step 1: Choose the Right Connector
First of all, you should know that RGB fans use different connectors.
The fan will have one set of cables that you will connect to the connector on the motherboard.
Generally, fan connectors come in either three-pin or four-pin types.
The rule is that if you have three cables in the connector, you need a three-pin connector to support it.
You can’t use a four-pin RGB fan with a three-cable connector.
That said, make sure that your motherboard cable supports the RGB fan type you wish to use.
Basically, you’ll want to check the specs before you buy. This rule applies not just to motherboard components but to all other computer hardware devices.
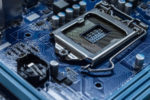
Step 2: Access the Motherboard
The next step is to remove the case so that you can easily access the motherboard.
To be safe, turn off your computer and unplug it from the power source.
PC case panels are secured with screws, so carefully unscrew the bolts to open the case.

Step 3: Insert the Fan Connector
There’s no trick to connecting fans to the board. You only need to line up the notch on the connector.
For this, you will find a guide on the header of the motherboard.
To do this, you’ll have to align each side and gently press the connector into the header.
Next, examine to see if the connection is secure.
You will know if you have a secure connection when you see the fan’s connector’s end flush with the motherboard header.
Check to see if the connection appears or feels loose.
Note that the connector doesn’t include a latch to keep it secure, so you can easily remove the fan connector by pulling it straight out.
It would be best if you put some pressure when connecting the RGB fan connector to the mobo header.
Step 4: Set Up the RGB Fan
At this point, you can now set up the RGB fan inside your PC case.
Place the fan in front of the rear side of the case, wherever the available space is.
RGB fans come with screws for attaching them to the PC case, so you’ll only need a matching screwdriver to secure it in.
Installing a Four-Pin RGB Fan
If you’re using a four-pin RGB fan, the installation is quite different.
Essentially, you need to insert the fan connector to the mobo header.
However, you need to insert the dual four-pin connector inside the header to ensure maximum RPM.
Next, push down the connector into the mobo header.
Make sure to apply good pressure so that the pins get into the header deeply.
Once you have securely attached the connector, you can now place the RGB fan inside the case.
While it’s possible to plug a three-pin fan into a four-pin connector, doing this will disable the pulse width modulation (PWM) support.
As a result, you won’t be able to control the fan’s speed.
PWM is the standard method for fan control. It can support very low fan speeds without any issue and also reduce noise.
To address this concern, you can change the voltage sent to the fan instead.
Can You Install an RGB Fan Without a MOBO Header?
Yes, you can, but the process will be different.
Firstly, you need to get an RGB fan controller. Once you have it on hand, follow these steps:
Step 1: Shut down your PC and remove the computer case.
Remove the cover in the back where you can reach the motherboard easily.
Step 2: Insert the controller into the cable inserted with a three- or four-pin dual connector.
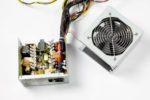
Step 3: Attach the other side of the cable to the motherboard SATA cable.
Doing this will connect the RGB fan to the board and supply power to the RGB fan.
Step 4: Adjust the fan and the case.
RELATED: How To Connect Power Supply To Motherboards (Guide)
Conclusion
Connecting an RGB fan to a motherboard is a simple and pretty straightforward process.
You just have to make sure that you’re using the right connector for your device.
If your mobo doesn’t have a header, you can still attach a fan using a controller, which you will then hook to the mainboard through a SATA cable.