How To Install SSD on Motherboards: The Essential Facts You Need To Know

Since its launch to the consumer market, solid-state drives or SSDs have taken desktop computer capabilities to new heights.
The SSD, unlike the hard disk drive, operates on non-volatile memory to process and retrieve data.
Many pre-built desktop PCs nowadays are equipped with an SSD, for good reasons.
Sure, it will occupy a SATA power connector that you could use for another high-memory hard drive, but it's worth the slot in your desktop system.
Let's check out how to install SSD on motherboards and other related topics that may help you in your next PC building or upgrade.
The Benefits of SSD on Your PC
Compared to a regular hard drive, using a solid-state drive or SSD on your PC has numerous benefits.
It makes the boot-up sequence faster, restarts and shutdowns quicker, reduces gaming load times, and also loads other programs at a better rate.
You also miss the spinning sound and periodic buzzing that a traditional hard drive produces.
Another great aspect is that you'll find that your computer produces less heat due to the SSD's lower operating temperature.
With all of the mentioned benefits, learning how to install SSD on motherboards is certainly an excellent skill to have.
To top it off, the average market price of this component shouldn't hurt your budget too much.
ALSO READ: How To Remove CPU From Motherboards
Important Reminders Before SSD Installation
Before you start removing the cover of your case, below are a couple of things you need to keep in mind.
Installers
Most likely, you're interested in getting an SSD because of the faster loading time of the operating system and some programs.
As such, you need to have the installer files of your programs available at any time once the operating system gets installed.
Speaking of OS, make sure you have a working and genuine copy of Windows.
For obvious reasons, it will be the first system that's going to get established on your new SSD.
Save on your phone or a piece of paper any pertinent information, such as the serial number and activation key, for the installers, if any.
Backup
Even if you're not installing a new component or upgrading parts of your desktop, it's essential to ensure that your important files have multiple copies.
These documents should be available online and offline, just in case your desktop is not available to use.
You can use external storage such as flash drives, writable compact discs, or portable hard disks to back up your data offline.
If you intend to back up your files online, utilize your preferred cloud storage service.
Google and Microsoft offer this type of online file storage and other digital companies such as Dropbox and iDrive.
Most of these companies provide free storage space, but you may have to pay a subscription if your files are too large.
Tools
It would be extremely difficult or not possible to install an SSD or any PC internal component without using tools.
A screwdriver is an essential companion for installing or removing computer parts, so make sure you have a set before you start.
You can also consider using an anti-static or ESD wrist strap if you want to ground yourself while handling equipment safely.
If your PC is not plugged for some time, it's probably safe not to use an anti-static wrist strap.
Detach Connections
It is highly advisable to remove all the wires attached to the back of your case before you install your SSD.
These connections include a mouse, keyboard, monitor, AVR, and all other peripherals.
You'll have an easier time moving the case into a convenient position if there are no cords attached to it.

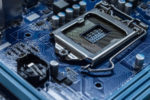
How To Install SSD on Motherboards
After you have prepared all the installers and tools, it's time to mount the SSD into your desktop system.
1. Remove the Cover
To remove the side panel, you may need to pop up a clip that locks it in place or detach two rear panel thumbscrews.
2. Position the SSD
3.5-inch hard drive slots are available on all desktop systems.
HDDs and other drives are always positioned in these bays.
As SSDs become more mainstream, most cases on the market nowadays include a hard drive caddy that houses the SSD.
Secure the SSD to the caddy by using the four mounting screws.
Afterward, slide the hard drive caddy into the drive bay.
Ensure that your SSD slots are facing the direction of the power supply, similar to other drives.
Lock the caddy into place by screwing them using the screws that come with the SSD.
If your case is older, you may have to purchase mounting brackets to secure your SSD into place.
3. Connect the Cables
After you've secured the SSD, attach the data and power wires to the relevant ports on the motherboard.
Like other drives, SSDS require a connection to the motherboard and PSU.
The L-shaped connector on both ends of a SATA cable is the same, which ensures that you can only insert the adapter in a single direction.
Line up the SATA cable end with the SATA connection on the storage drive, then carefully slide the cable into the drive.
Once you have established the connection of the SSD to the motherboard and power supply, the rest is easy.
4. Close the Case
Before you reattach the cover of your case, ensure that all the connections inside are intact.
Once you close your PC case, connect all the components you remove from the back earlier.
Installing M.2 SSD
Installing an M.2 SSD is a new option to boost your PC's performance.
This SSD variant is about the size of a RAM stick.
The M.2 designation relates to the drive's form factor and how it attaches to the motherboard.
It is similar to a standard SSD in terms of functionality.
That said, instead of connecting via a SATA III connection, the M.2 SSD links to the motherboard via the M.2 PCIe slot.
While an SSD will significantly outperform a regular HDD, an M.2 SSD exceeds the speed of the former.
1. Check the M.2 Connector of Your Motherboard
Multiple M.2 ports are available on certain motherboards.
If your mobo has four or more SATA drives, you'll need to use a dedicated M.2 port.
It's crucial to double-check your motherboard paperwork to see which slot the M.2 SSD should go.
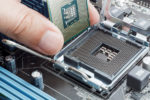
2. Mount the M.2 SSD
Remove the holding screw from the port.
Use a Phillips head screwdriver and slowly screw until it is completely detached.
After that, double-check that the SSD disk and connector are compatible, and then insert it into the port at a 30-degree angle.
In some instances, you may have to nudge it in a little.
It should stay at a 30-degree angle after it is mounted properly.
Afterward, you just have to screw the M.2 SSD until it is secured.
Ensure that you screw it with just enough force as it may lead to issues and damages if you tighten it too much.
Using the SSD
Now that you have installed the SSD into your desktop PC, you have to make a couple of adjustments and installments to experience its potential.
Configure Your BIOS
You have to access your BIOS setup if you want to install your operating system into the SSD.
If you're not familiar with it, it is only accessible in a few seconds once your PC boots up.
Depending on the manufacturer, you have to either press Del. Esc. F1, F2, or F10 to enter BIOS setup.
Usually, you'll see the correct button to press at the bottom of your screen.
Remember, there are only about one to two seconds before your computer starts loading your OS after booting, so you have to press the key quickly.
Once you successfully open the BIOS setup, look for the setting that enables you to change the boot priority.
Confirm which drive you'll use for installing the OS; it's either DVD-Rom Drive or Removable Devices (flash drive).
Alter the priority until you see that the drive where your OS installer is at the top or number one and your SSD is second.
Navigate the setup and find "Save and Exit."
Before pressing enter, it is advisable to insert the OS installer disc or the flash drive.
The system will restart immediately once you press enter.
If you have already loaded the DVD or flash drive, the system will prompt you to run the OS installer once the reboot commences.
OS and Programs
After installing Windows, you'll notice a massive improvement regarding the loading time of the OS compared to when you're using an HDD.
Install the programs you frequently use, but as much as possible, do not save all of them to your SSD.
SSDs, in general, have a lower storage capacity than HDD, so make sure to prioritize what applications you should install.
If you already made a backup of your files, you can safely format the HDD.
It is highly recommended to use the HDD for storing media files and documents.
RELATED: How To Install Motherboard Drivers (Guide)
Conclusion
Like with any other PC component, the process of how to install SSD on motherboards shouldn't be complicated as long as you have the right tools and preparation.
Building and upgrading your desktop is fun and educational, especially when you can have loads of references to choose from.